
I recently ran into the problem that the backup storage of my Synology NAS ran out of space. Buying a bigger harddrive is trivial – keeping all existing backup data and continuing incremental backups is not. I googled a lot because I thought this is a fairly common problem, but strangely I couldn’t find any guides on that. So, I did a little bit of trying and hacking and in the end, the solution was simpler than I expected. In this post, I want to show you how I did it.
But first, let me show how I set up my network:
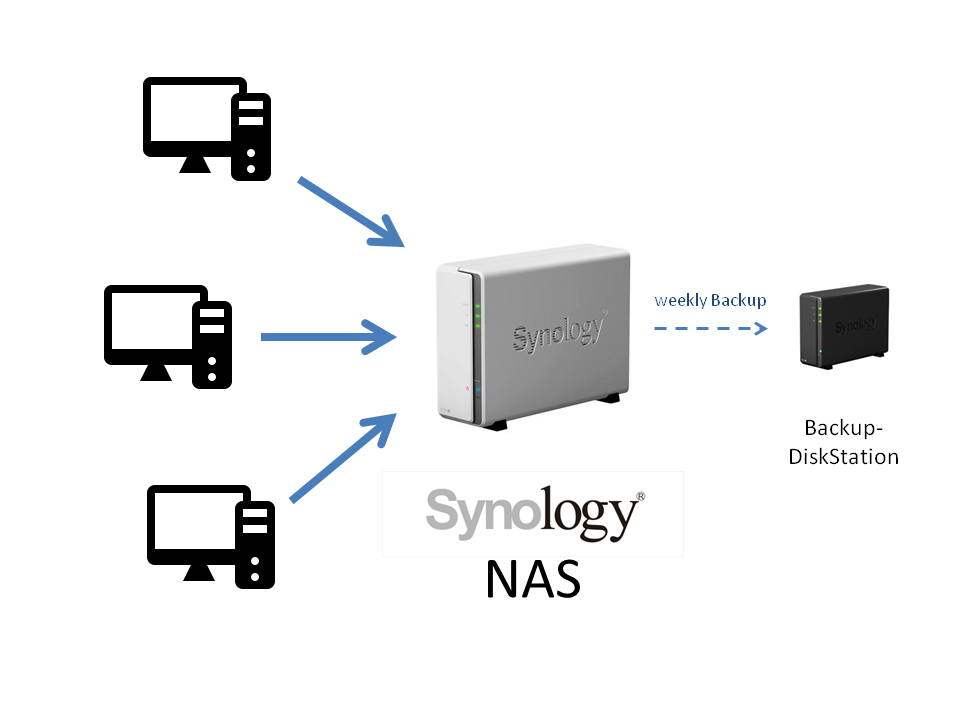
All computers use my main Synology NAS (a DiskStation) to store their files. Once a week this DiskStation runs an automatic backup and copies all new files onto an older DiskStation, whose only purpose is to store backup data. These backups form so-called Restore Points, meaning a point in time to which I can return and restore files from back then. The backup is handled with Hyper Backup, on the Backup DiskStation I have Hyper Backup Vault.
Now I have this setup running for years, with the result that I have many Restore Points and can restore data from almost any point in time. But now it happened that the harddrive in my Backup DiskStation became full. As you can imagine, I didn’t want to lose all those valuable Restore Points, I just wanted to swap the harddrive with a bigger one and continue my incremental backups. But how?
There is something called the Synology Migration Assistant which sounds promising. Unfortunately it doesn’t support my DiskStation models so this was no option. In the DiskStation’s Control Center exists the possibility to do a backup of the configuration, but that doesn’t include anything from Hyper Backup Vault, let alone the backup data itself. I SSH’ed into my DiskStation and found out that the main harddrive does not only store the data, it also stores the DiskStation’s operating system (DSM). This is the reason why after swapping the harddrive you have to install everything from scratch.
The solution
I bought a bigger harddrive, replaced it and installed DSM from scratch. I also restored a configuration backup, but don’t expect too much from this, it only restores a few settings such as the user accounts. I installed Hyper Backup Vault and in the end, had a fresh, empty Backup DiskStation.
I also bought a cheap external eSATA case (a FANTEC DB-ALU3e-6G) for being able to read my old harddisk. I inspected the directory that contains my backup data, and here comes the important information: All data about this backup is stored in this one directory. That means, simply copying the whole directory onty my new harddisk should do the job!
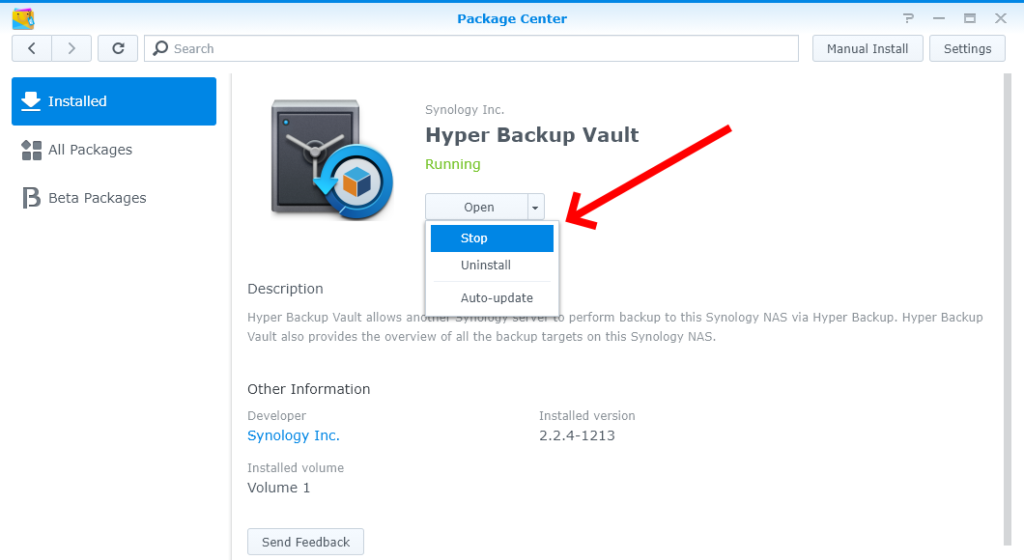
First, I stopped the Hyper Backup Vault service, just to be sure:
Next, I started the copy operation:
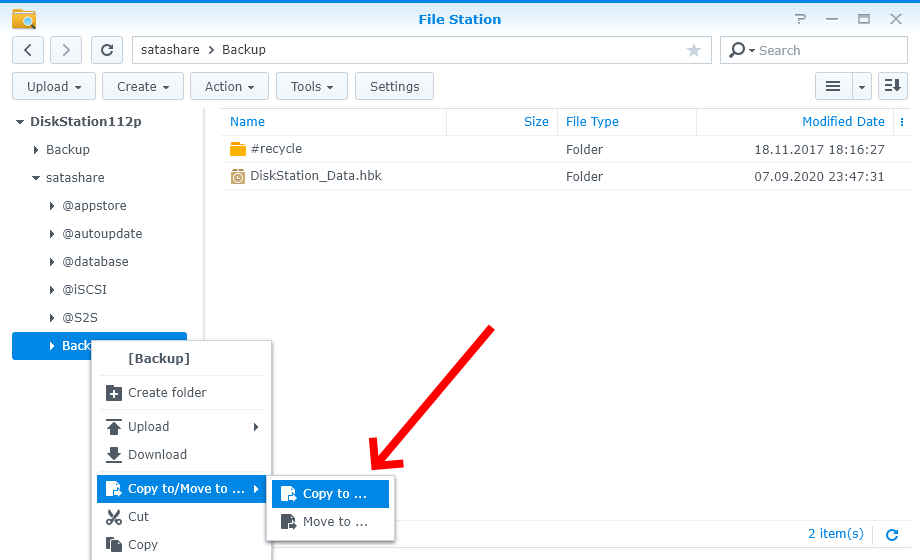
In the screenshot above you can see two “Backup” directories in the tree to the left:
- The first “Backup” directory directly under “DiskStation112p” is the new, empty directory that has been created when I installed Hyper Backup Vault on the new harddrive. This is the target directory where my backup data will be copied to.
- The second “Backup” directory below “satashare” is from Hyper Backup Vault on the old harddrive. You can see in the screenshot that it contains “#recycle” and “DiskStation_Data.hbk”, which contains all my valuable backup data.
So, by right-clicking on the old “Backup” directory and selecting “Copy to…” I copied everything to the new harddrive. Mind you, this sounds so quick but my 3.5 Terabyte almost took a week to copy!
In the end, I just had to start the Hyper Backup Vault service again. Just to be sure, I asked Hyper Backup on my NAS to perform a full backup integrity check, and luckily, it succeeded without any problems. Hooray!