
Now that I have finished designing the bowl feeder, it’s the time to get it 3d-printed. I never intended to 3d-print it myself, this would be similar to making printed-circuit boards (PCBs) myself: It would be a huge project of its own and there are companies out there, who offer professional quality at a very good price. But still, one has to understand the challenges of 3d-printing in order to avoid common pitfalls in designing the model.
So I searched the Internet for a suitable printing-service provider. I found https://all3dp.com/, who submit your model to different providers and show you the providers with the best price vs. the shortest delivery time. Both parts, the bowl and the base cost me less than 20€ each incl. shipping and VAT.
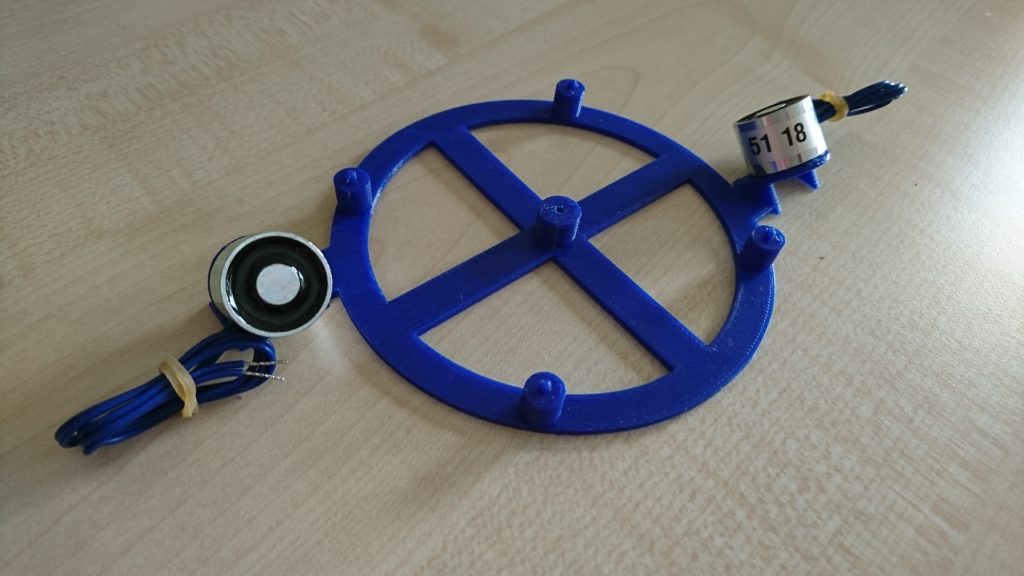
base with electromagnets
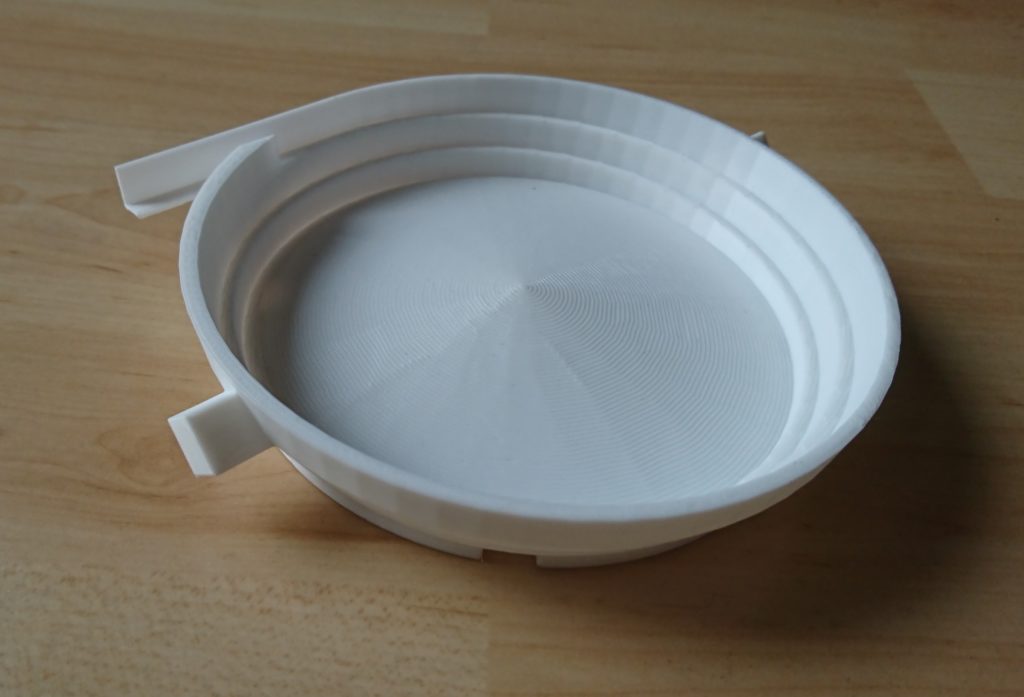
Overall, I am satisfied with the result, but it will need some after-treatments:
- The biggest issue is what I already feared: Since the 3d printer only prints horizontal layers, the ramp shows small steps. I need to treat this with some sand paper, otherwise the perler beads will probably not make it over these steps.
- Another thing that needs some post-production treatment is the hole in the center that will hold the center axis (to stabilize the bowl in case the pull from the electromagnets is not 100% symmetrical). Making accurate holes is not one of the strengths of 3d printers.
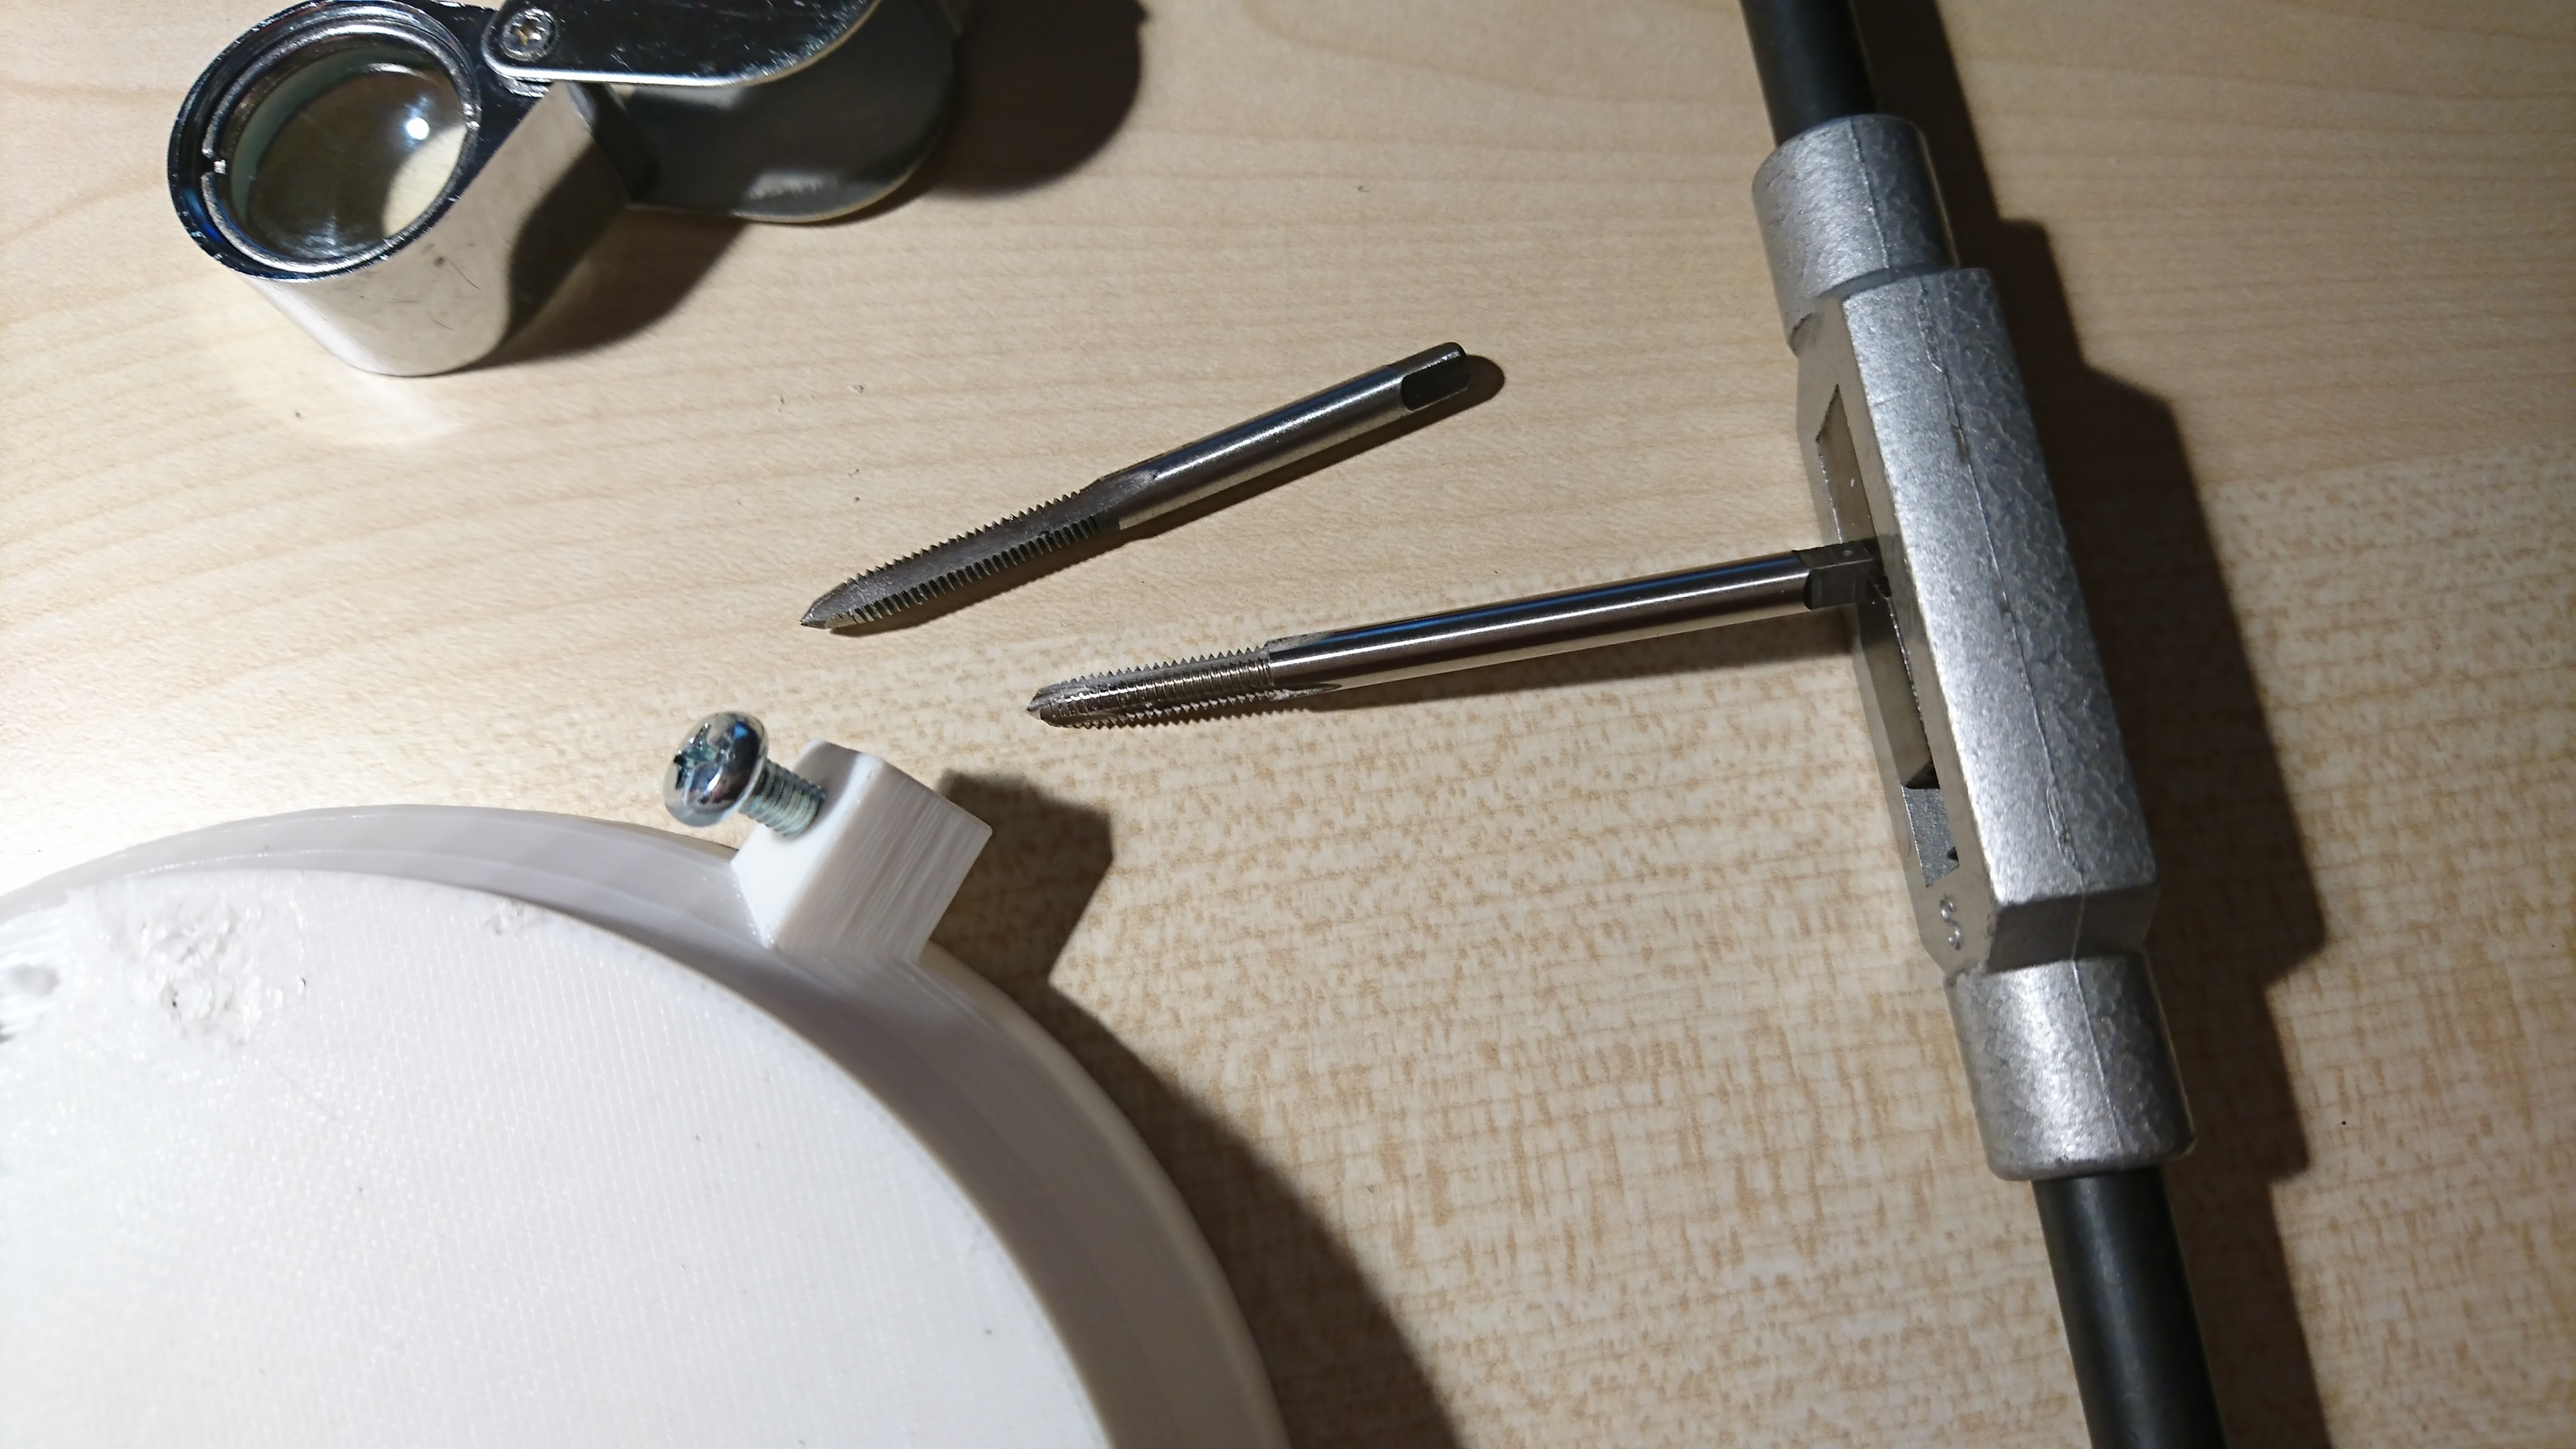
- Finally, I have to cut the screw thread into the holders of the bowl, for the screws that will be pulled by the electromagnets.
I was planning to order the rubber stands from a 3d-printing service too. Then I could have tried out different heights and different diameters. Unfortunately, all3dp.com didn’t offer real rubber, just flexible plastic, and that was quite expensive. So until now I have not ordered any, I plan on trying a few other alternatives and see how that goes.
But: Before I can try different alternatives I need the electromagnets working. That means I need circuitry that switches power on and off at a high frequency. Ideally, frequency and amplitude are adjustable, so that I am able to find just the right combination. So the next steps in my project will be about the feeder’s control circuit.
Are you willing to share the 3D print files?
Hello as above I wanted to ask if you are willing to share the 3d stl