A bowl feeder consists of more than just the bowl: It needs a stand and, most importantly, some kind of suspension to allow it to vibrate as needed. When planning the next steps, I quickly realized TinkerCAD will not be the best tool to support me with these things. When I discussed my project with a professional, he recommended Autodesk Fusion 360. He also pointed out there is a free license for hobbyists and start-ups (thanks Florian!). Since one of the goals of this project is to learn new technologies, I thought I should learn them with the proper software. So that’s why I decided to work into Fusion 360.
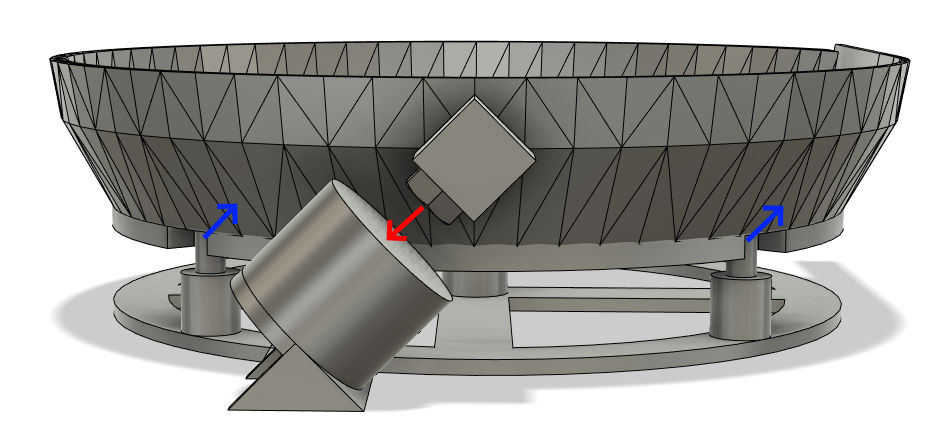
Let me first discuss the suspension: the bowl must be able to rotate around its center vertical axis and move up and down. Together, this will be the right movement to throw my perler beads up the ramp. I came up with different ideas for the suspension, I even built a model with fischertechnik to try out one idea:
Although the above suspension would surely work, I think it would be complicated with the rubber bands. Also, I don’t need the big freedom of movement that this kind offers. I only need small vibration, an amplitude of some tenths of a millimeter. So I decided to place the bowl on rubber stands, use electromagnets to pull it in one direction and hope that the rubber stands will give enough force in the opposite direction.
When starting with Fusion 360 I thought I will re-implement the bowl generator with some scripting language in Fusion 360. This doesn’t seem to be possible, at least I didn’t find a way to programmatically generate new bodies. So it seems the best alternative is to generate the bowl with my JavaScript in TinkerCAD, save it as STL and import this in Fusion 360.
Importing STL models in Fusion 360 is not straight-forward, so I’d like to describe that process here so that others have it easier than me:
- Select Create Base Feature from the Create drop-down menu to change into direct editing mode.
- Select Insert Mesh from the Insert drop-down menu to import the STL file as a new mesh. Fusion 360 will allow you specify the STL’s units (e.g. millimeters) and specify where to place it.
- After you have inserted the mesh, right-click it and select Mesh to BRep. This will then create a new body.
- The final step is to click on Finish Base Feature.
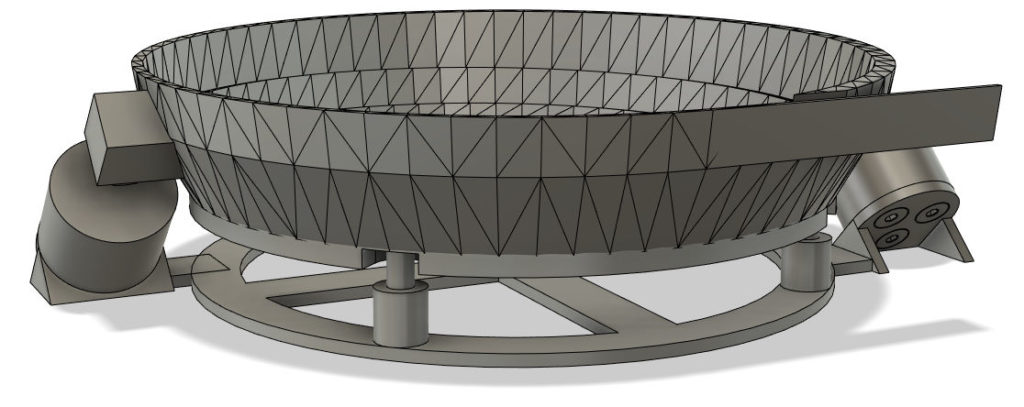
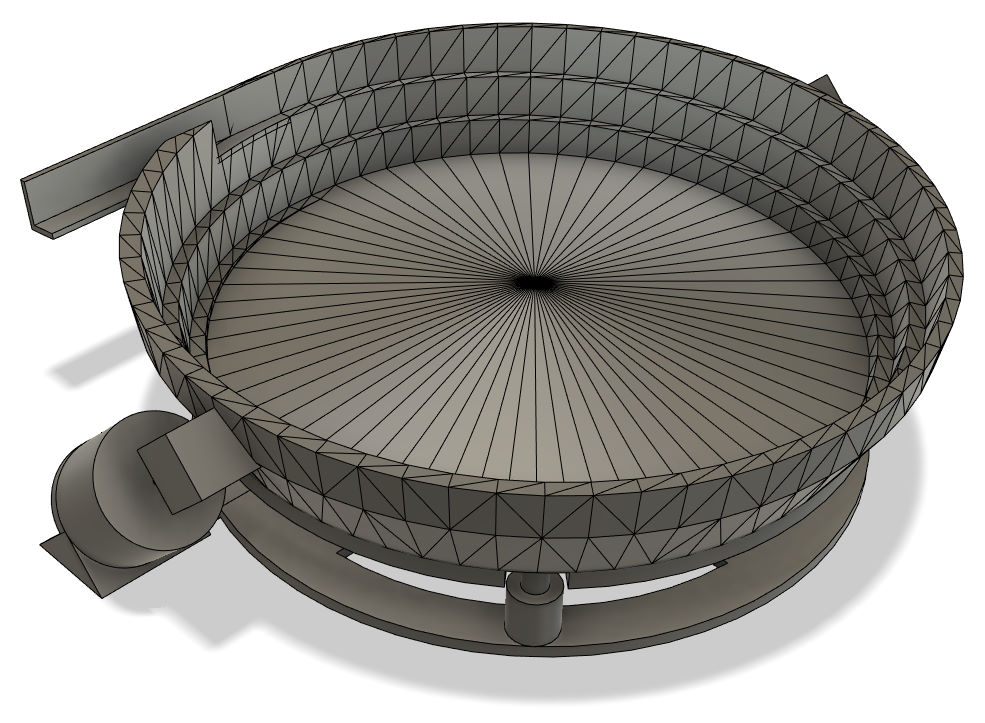
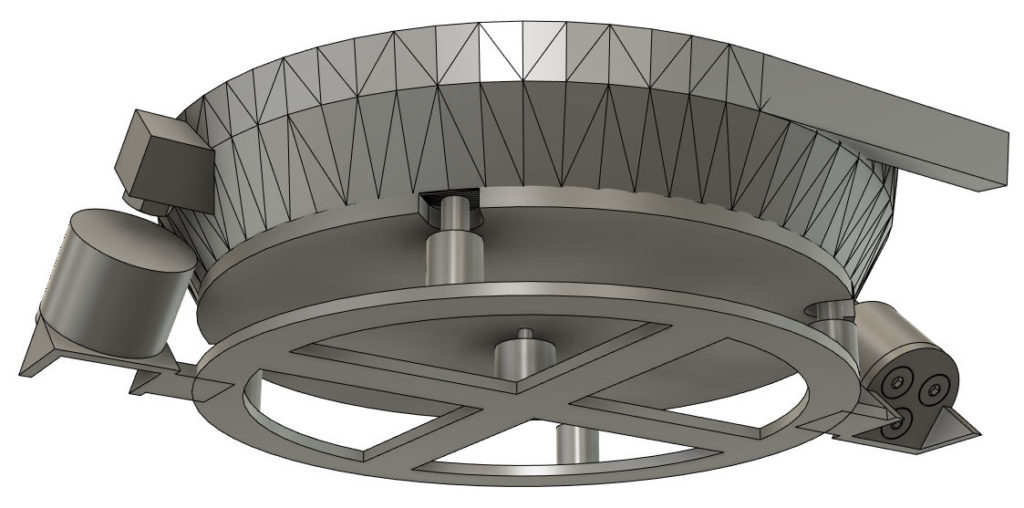
Back to designing the model for the bowl feeder: I learned how important it is to structure your model into separate components. I learned how to insert McMaster-Carr components such as screws into the model. And I learned how to use joints to combine the different parts with screws (although I have to admit, this still doesn’t work as smooth as it should).
The result of all this can be seen on the pictures below: